Revit® Tips & Tricks #2

Project model environment
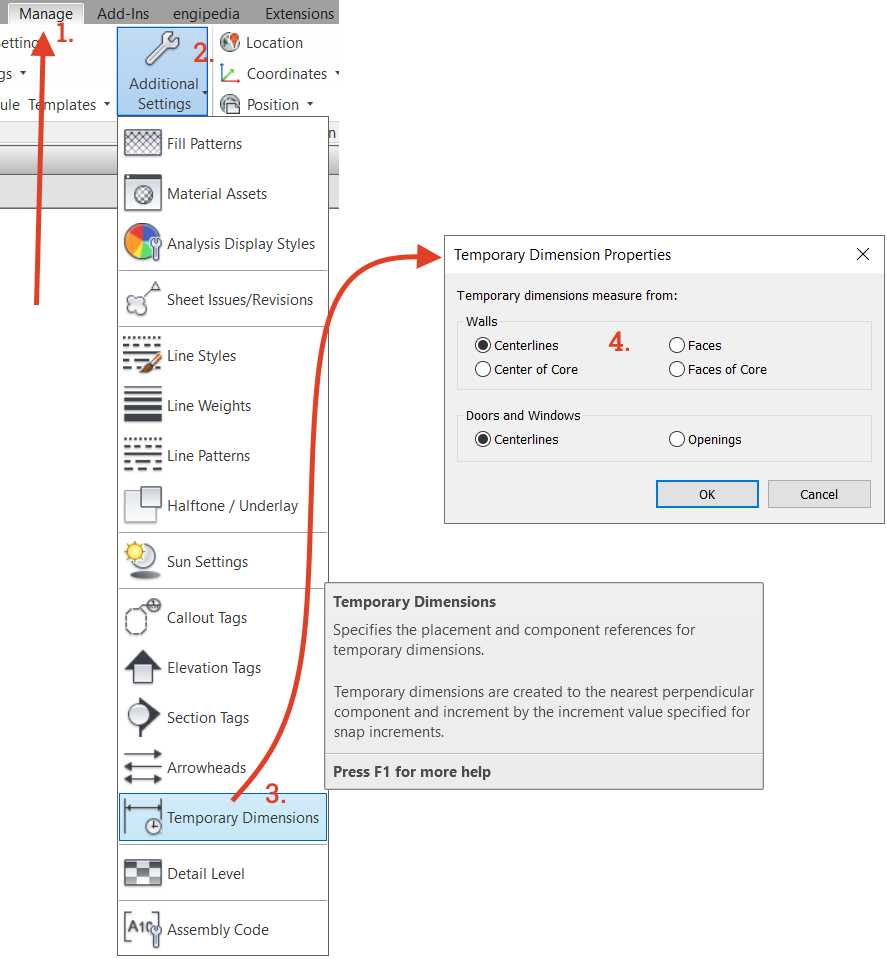
1. Changing Temporary Dimension Behavior
When modeling elements in Revit, temporary dimension lines help place elements precisely. If you notice that the temporary dimension lines are snapping to the wrong references, you can adjust the settings to prefer specific references for snapping.
2. Default IFC Revit Project Template
When linking an IFC file to Revit, two things happen:
- Creating an IFC File: Revit selects the first template specified in File > Options > File Locations to create the IFC file.
- Saving the RVT File: Revit generates a RVT file from the linked IFC model and saves it in the same folder with the same name as the IFC file.
You can find the linked IFC (which is actually a Revit model file) in the Manage Links dialog under the IFC tab. Here, you can reload the IFC file if a newer version (with the same name) is saved in the same location. Reloading will regenerate the linked Revit file.
To minimize IFC file size and loading times, it’s recommended to create a separate Revit IFC template that contains essential settings such as line weights, line patterns, object styles, and a single level. This template should be set as the first in the template list so that it’s used every time an IFC is loaded into the project.
3. Changing Levels of Cable Trays, Pipes, Ducts, and Conduits Without Moving Elements
If you need to change the level of entire systems in Revit, it can be tricky, especially for linear elements like pipes that also have slopes. While Revit allows you to change the level of these elements, it will adjust their positions relative to the new level.
To change the levels of elements while keeping them in the same absolute position, use the free Dynamo script I created for this purpose.
Kako promijeniti referencu Revit® familije bez pomicanja elementa
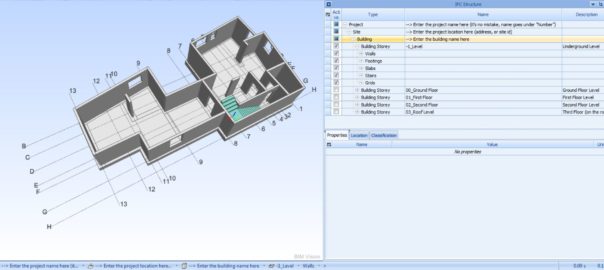
4. Creating a Multi-Category List with Selected System Family Categories
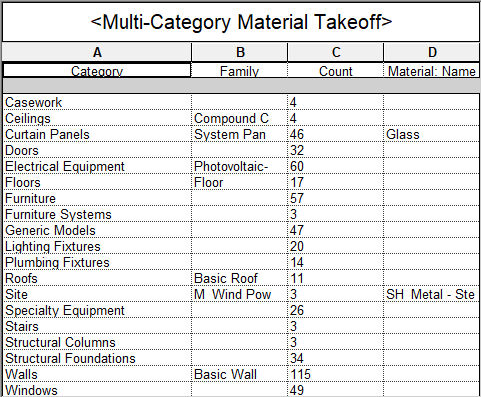
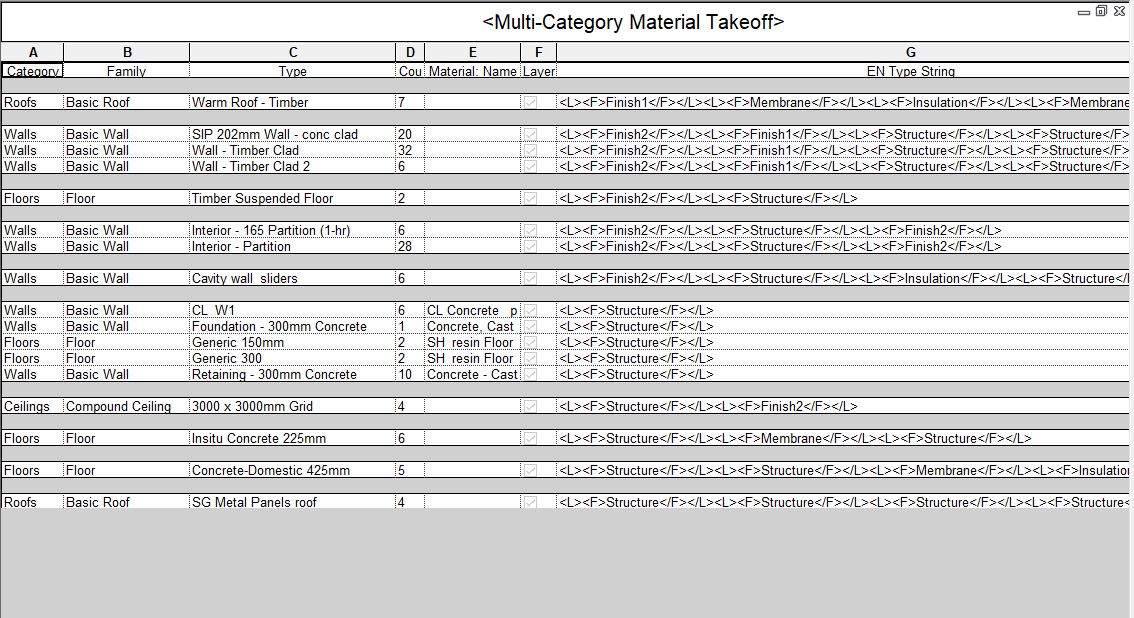
Multi-category schedules in Revit do not include system families. Instead, use the multi-category material takeoff schedule. The following image shows an example from a Revit sample architectural project, sorted by category, with “Show all instances” set to false.
If you only need Ceilings, Floors, Roofs, and Walls, here’s how to do it:
- Add a unique shared parameter only to the categories you want in the schedule. Use a yes/no (Boolean) type parameter named “Layered” that you create in your shared parameter file.
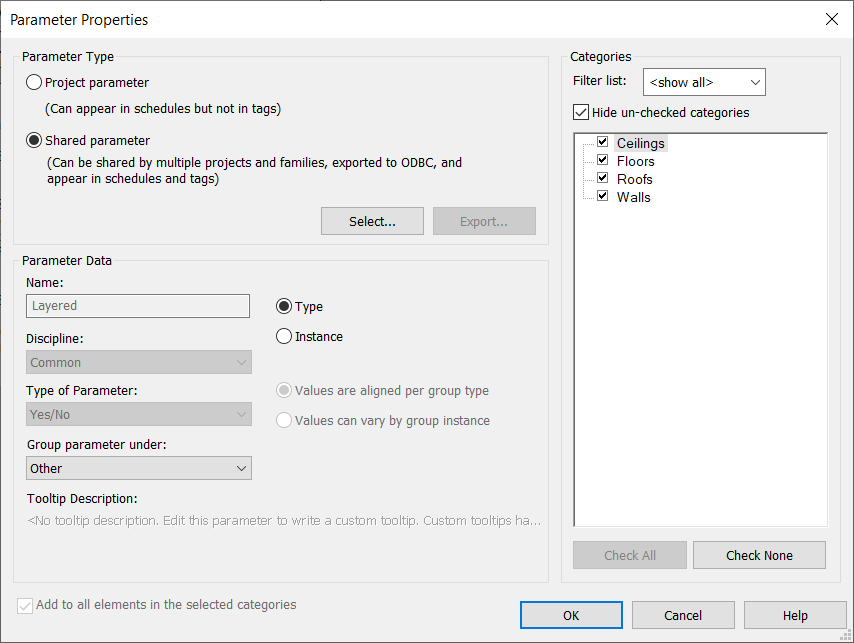
- Filter the schedule by the “Parameter Exists” rule to display only the desired categories.
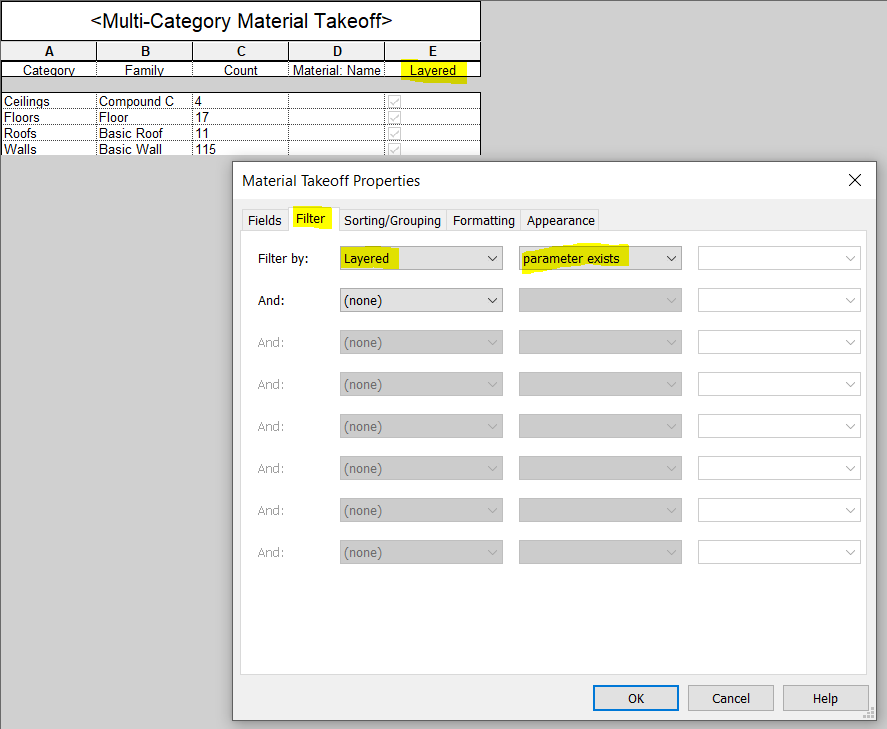
There are two important points to remember:
- You cannot add parameters to system family categories through the Revit schedule Fields dialog; you must go to Manage > Project Parameters.
- The “Parameter Exists” filter rule is only available for shared parameters.
5. Comparing Wall, Floor, Ceiling, or Roof Types to Identify Duplicates
Finding duplicate layered types in Revit can be challenging due to the various settings that define layers, including:
- Is the layer inside the core?
- Layer function
- Layer material
- Layer thickness
- Does the layer define structural material?
- Can the layer have variable thickness?
- Can the layer wrap?
Walls also have options for wrapping at inserts and ends.
To simplify finding duplicates, you can compare layered instances using Engipedia Layers Manager (since version 1.1) and the multi-category material takeoff table described earlier.
For instance, if you set up the add-in options to create a comparison string based solely on the function of each layered type, you can also find elements with the same materials and thickness, regardless of other layer properties.
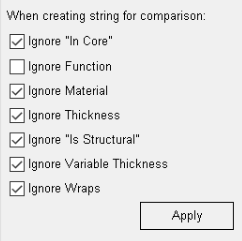
Add-in will create comparison string containing only function of each layered type. The same principle can be used to find elements with the same materials with the same thickness or regardless of thickness and other layer properties.
Families environment
6. Saving a Family as a Family Template
Revit uses the following file extensions:
- .rvt – Revit project file
- .rte – Revit project template file
- .rfa – Revit family file
- .rft – Revit family template file
You can save to all these file types except for the .rft extension. To obtain a .rft file, save the family as a Revit family (.rfa) and then change the extension to .rft.
This is useful because you can create a family with your parameters, line weights, line patterns, fill patterns, materials, object styles, subcategories, and more, and save it as a template for future families.
If you save it to the default path for family template files (under File > Options > File Locations), for example:
C:\ProgramData\Autodesk\RVT 20xx\Family Templates\English\
it will be available whenever you create a new family. (Remember to adjust the RVT version number and language accordingly.)
7. Creating Fixed Value Family Parameters
To create a family parameter with a value that cannot be changed by the user in the Revit project environment, set it using the following formula syntax:
IF((1 = 1), “Fixed value”, “any value”)
Note:
- This will not work for parameters that cannot be set by formulas, such as materials.
- If you set this as a type parameter, it will have the same value for all types.
- You must use (1=1) in parentheses because Revit will return “Invalid Formula” if you use a number format like 123 456 789.00 in the Revit family editor.
8. Determining If a Number Is Even or Odd in Revit Families
To test if a number
is even or odd in a Revit family, you can use the following formula:
if(roundup(n/2) = rounddown(n/2), “even”, “odd”)
The trick is that roundup and rounddown function will round number differently when number is different from integer.
For example, for n=3
- roundup(3/2) = roundup(1.5) = 2
- rounddown(3/2) = rounddown(1.5) = 1
Since 1 ≠ 2, 3 is an odd number
For n = 4:
- roundup(4/2) = 2
- rounddown(4/2) = 2
Since 2=2, 4 is an even number.
You can also use even/odd mathematical functions to find out if an number is even, odd, integer or exactly half.
You can also use mathematical functions like cosine and sine to determine if a number is even or odd. For example, using cosine:
if (cos(n * pi (or 180°)) = 1, “even”, “odd”)
And to check if a number is exactly half or an integer, you can use:
if (cos(n * pi (or 180°)) = 0, “exactly half”, “not half”)
if (sin(n * pi (or 180°)) = 0, “whole number / integer”, “not an integer”)
Note: use pi or 180° depending on your angle settings in the Project Units dialog.
9. Accessing View Range in the Revit Family Editor
Did you know that the View Range dialog is also available in the Revit family editor? To access it, click on the view name instead of an empty space within the view. This way, the associated view properties will appear in the properties panel.
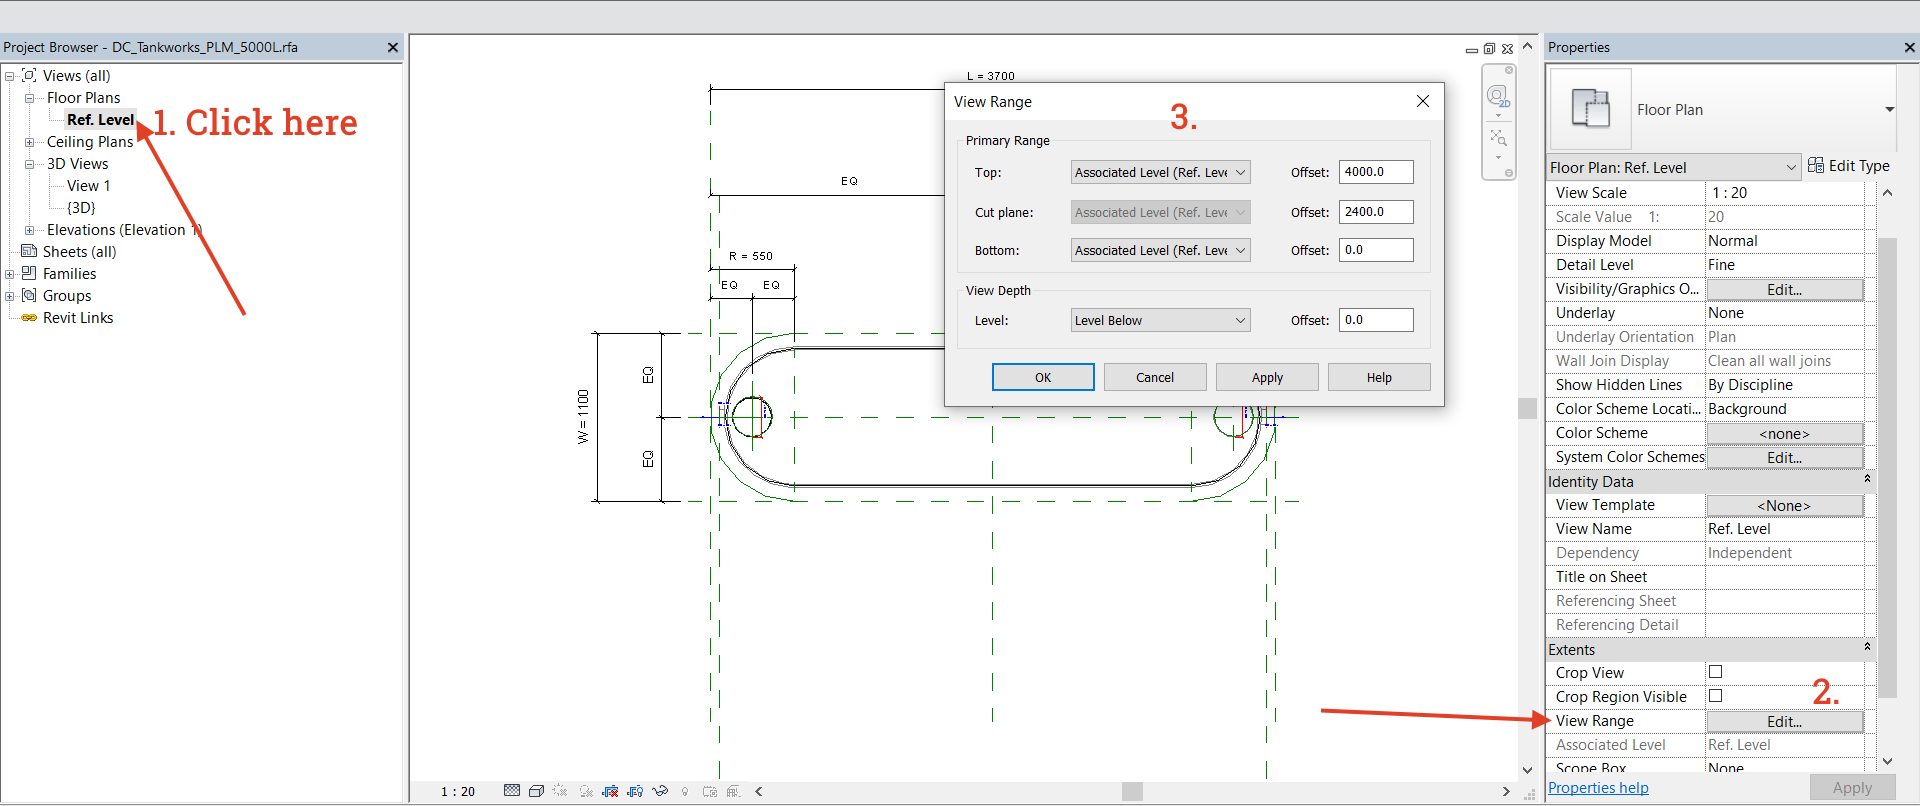
Additionally, a crop box is available in the family editor for the 3D view, although it may not function as expected.
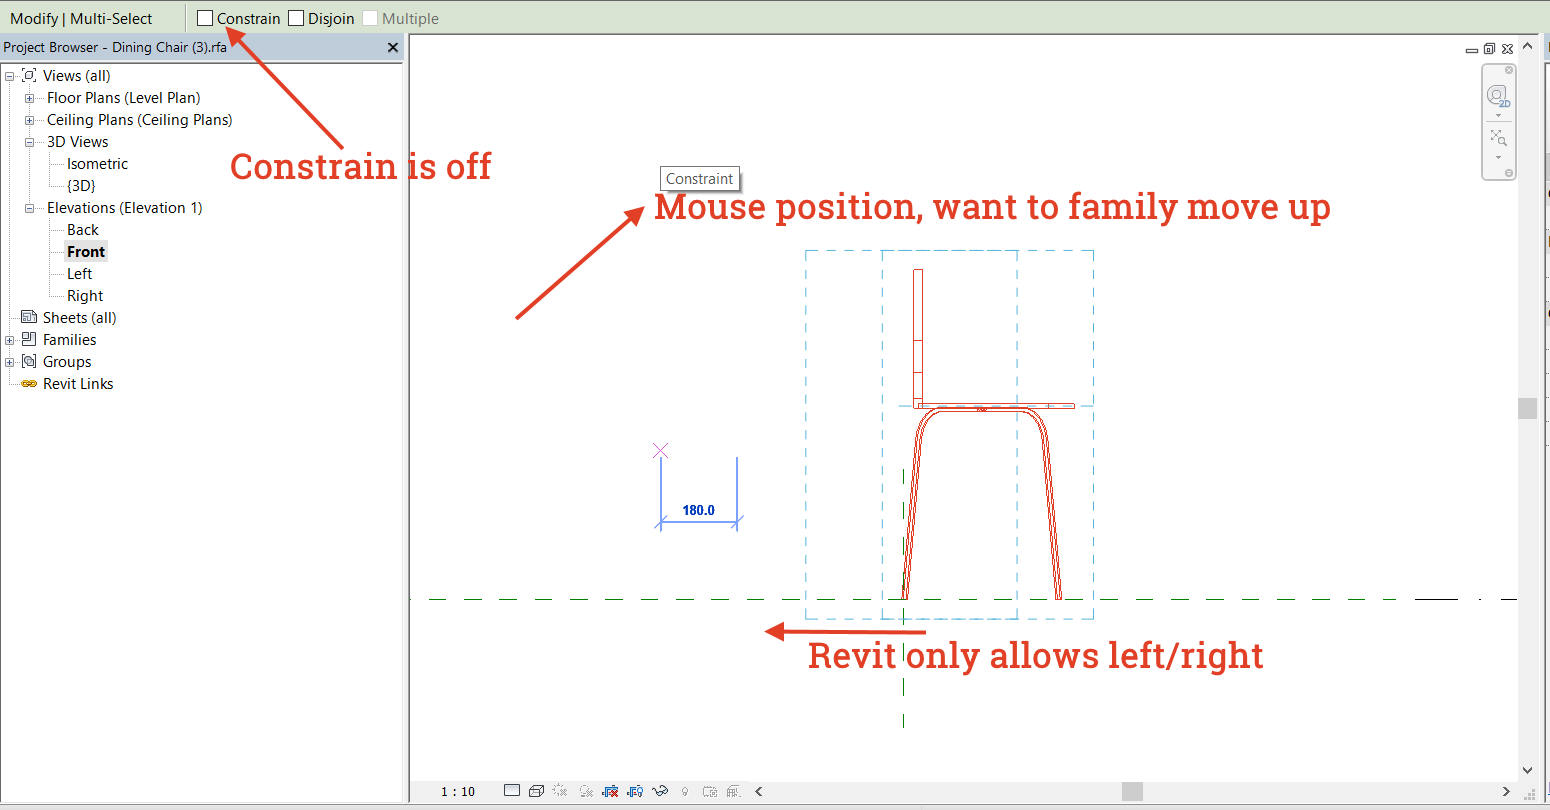
10. Moving Objects in Revit Families
In the Revit family editor, you may encounter an issue when attempting to move family objects up or down, regardless of the Constrain checkbox status. For example, even if Constrain is unchecked, you may only be able to move objects left or right in the front view.
However, you can select the family objects, cut them, and then paste them in the same location. After that, you can use the Move command again:
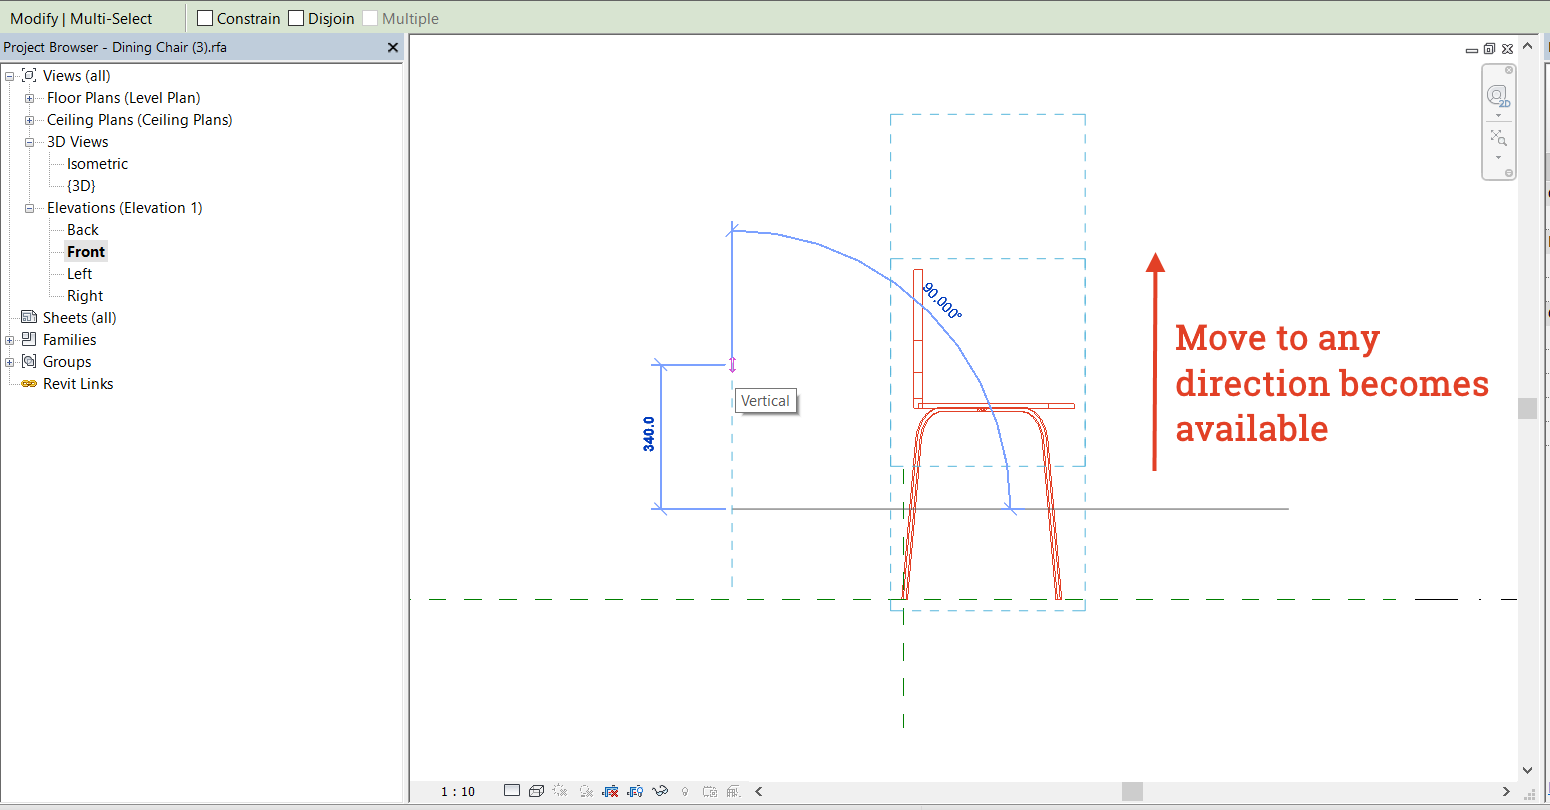
Now the family is detached from any attachments, allowing movement in any direction.
Use this trick cautiously, as it may affect your parameters and dimension lines.
I hope you found these tips helpful! If you learned something new, please share your thoughts in the comments below.
And if you haven’t done so already, be sure to check out Engipedia Revit Tips & Tricks #1 for even more insights!