Revit® Room Computation Height – What is it good for?
In Revit®, computation height is the distance above the room level where room perimeter is measured.
By default, computation height is 0 units above base level of room. To place rooms, they first must be enclosed with room bounding elements.
For example, the drawing below shows a section of 2 rooms which are on different heights. The dashed red line is computation height. Note that in Revit®, computation height line shows only when we select a room. It’s shown here for easier preview.
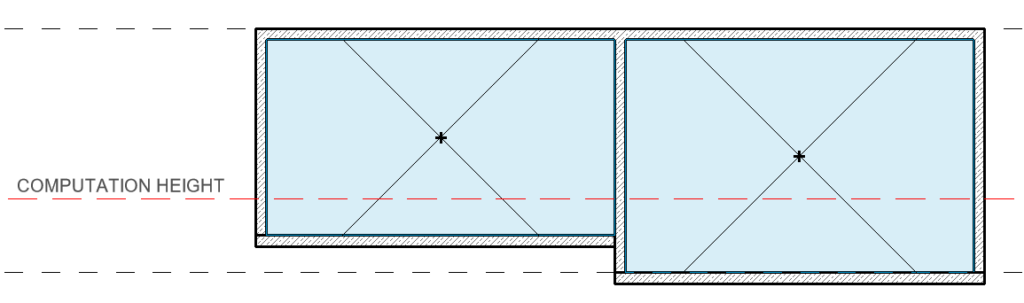
By the default, computation height is 0 units above base level of a room. This option is in most times accepted, unless we have room bounding elements which are above the computation height like on the left room in the drawing above.
To change the computation height, we need to go to any section or elevation, select the base level in properties palette, and change the computation height value.
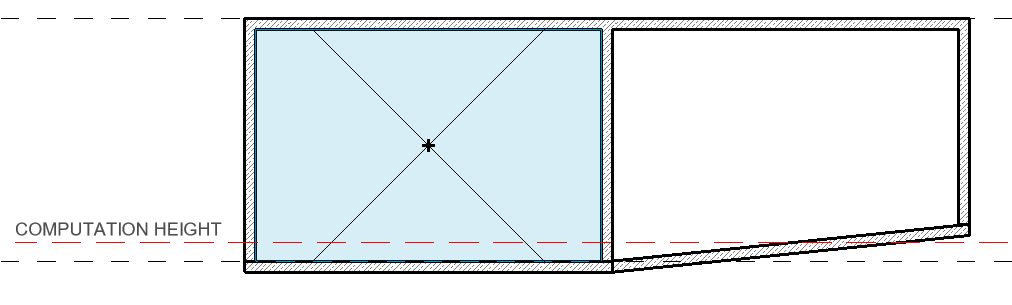
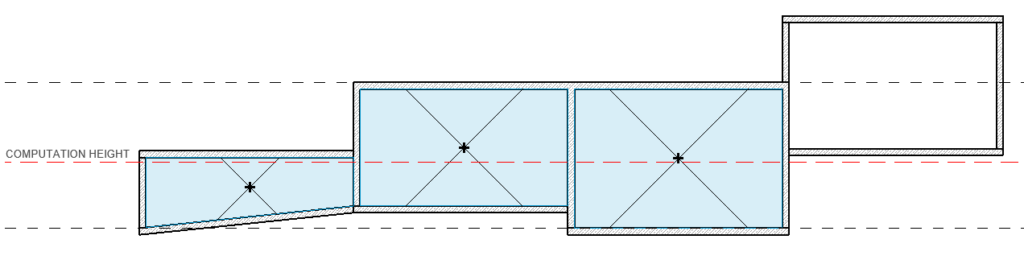
In the example below, we can see that room with sloped floor is not created since the computation height is too low and room is not enclosed (see drawing below: computation height line can’t reach the right room bounding element / wall).
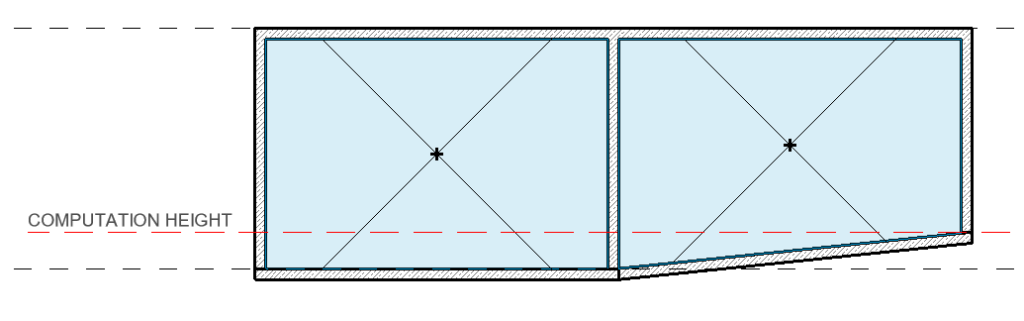
By rising computation height, we can see that room is now created.
The computation height can be useful in most cases, but sometimes a better solution is required.
In the drawings below, we can see that, if we rise the computation height to reach the right room, the room on the left will be out of reach.
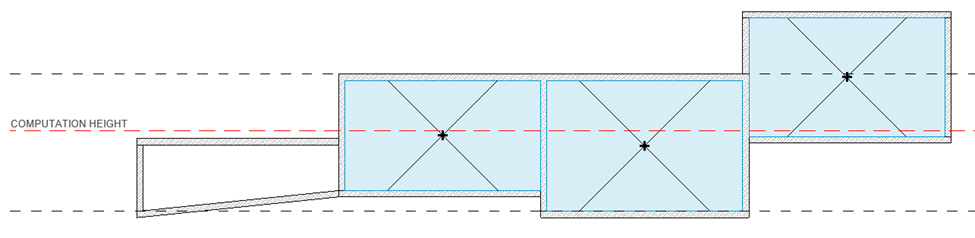
The solution is to assign the rightmost room to another level. The point is to use one level with one computation height, if possible, for all the rooms belonging to that level.
Rooms with sloped boundary objects
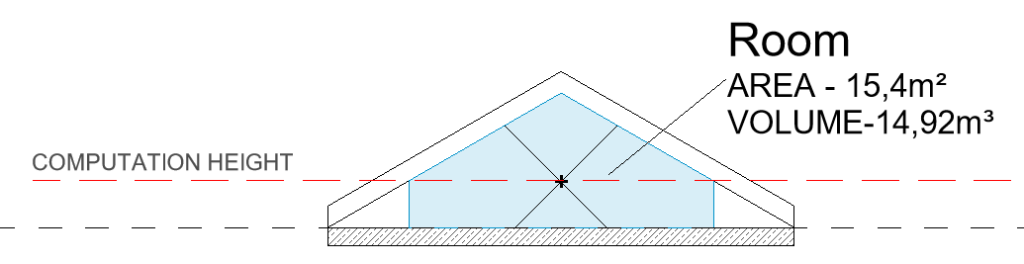
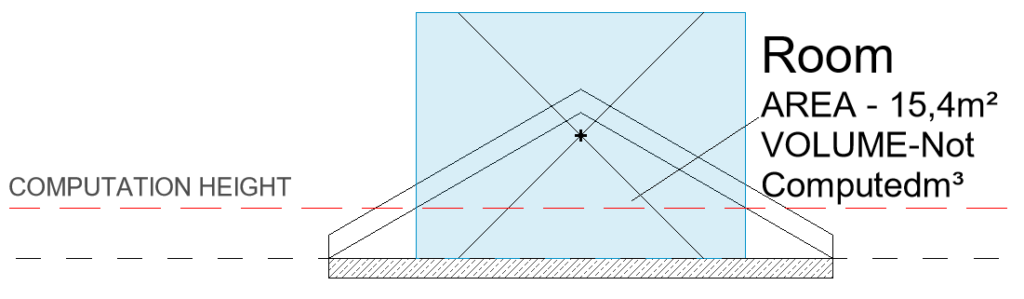
There is one more example of using computation height. The drawing below shows a section of a room with sloped walls/roof.

If we rise the computation height to appropriate height, the area and the volume will change the values. This can be useful for showing usable space.
Notes and issues
- Changing the computation height can affect the performance of Revit® (many rooms = many calculations during changes = more time needed to calculate all volumes).
- Room bottom or – Room Base Offset (Room Property) from the level must be below or equal to the computation height of the level, otherwise you will get the error message “Room’s lower offset is above the Computation Height”.
- Room top or – Room Upper Limit (Room Property) from the level must be above or equal to the computation height of the level, otherwise you will get the warning message “Room Volume is being calculated above the Upper Limit of this Room. Change the Upper Limit and Offset or change the height of volume calculations.”
- Sometimes if we have structural slab under the base level and non-structural floor (layers) above, the room will be created in the tight space of 0 height, which can cause issues, so the non-structural floor should have “Room bounding” option turned off.
- If you are getting rooms like these:
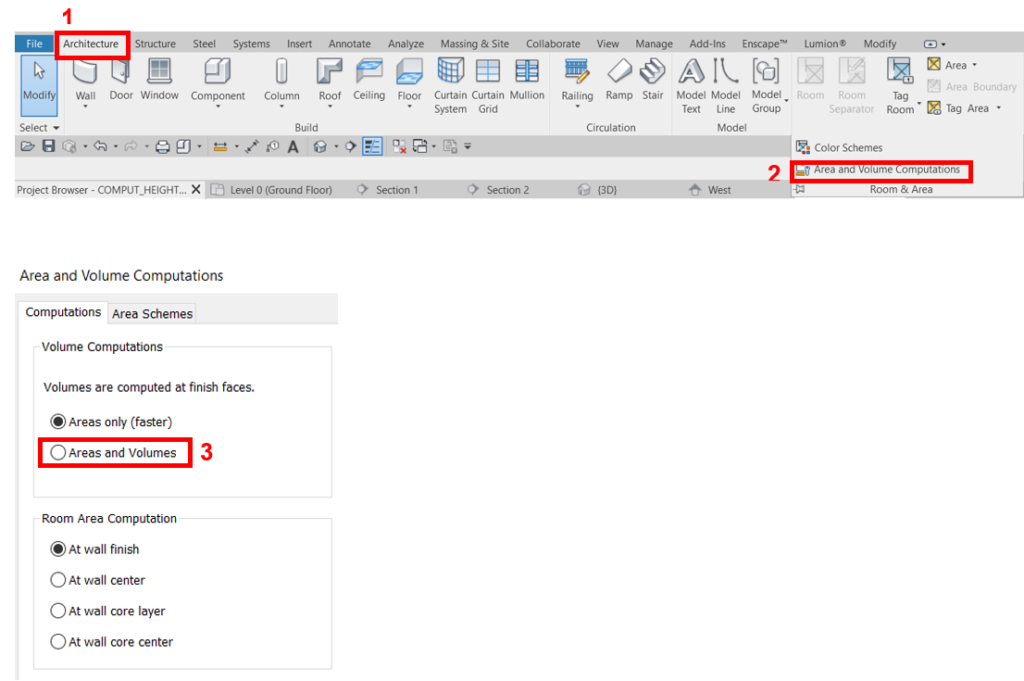
Change Volume Computations setting under „Area and Volume Computations“ (Architecture tab > Room & Area) to “Areas and Volumes”.
Thank you for sharing. I had problems with my space name. it is now resolved